Panzer General Domain-Driven Design

(Part 8 of the Panzer General Portable Project)

Next on the agenda for Panzer General was the domain modeling task. This is not a trivial undertaking because of the sheer numbers of units, equipment, and terrain that the game supports. Fortunately, resources by Scott Waschlin and Isaac Abraham give a good background and I have done some F# DDD in the past.

I started with a straightforward entity – the nation. PG supports 14 different nations representing two tribes – the allies and the axis. Ignoring the fact that Italy switched sides in 1943, my model looked like this:

type AxisNation =
Bulgaria
German
Hungary
Italy
Romania

type AlliedNation =
France
Greece
UnitedStates
Norway
Poland
SovietUnion
GreatBritian
Yougaslovia
OtherAllied

type Nation =
Allied of AlliedNation
Axis of AxisNation
Neutral


So now in the game, whenever I assign units or cities to a side, I have to assign it to a nation. I can’t just say “this unit is an allied unit” and then deal with the consequences (like a null ref) later. F# forces me to assign a nation all of the time – and then guarantees that the nation is assigned later on in the program. This one simple concept eliminates so many potential bugs – and which is why F# is such a powerful language. Also, since I am guaranteed correctness, I don’t need unit tests, which makes my code base much more maintainable.


I also needed a mapping function to interchange NationId (used by the data files of the game) and the Nation type. That was also straightforward:


let getNation nationId =
    match nationId with
    | 2 -> Allied OtherAllied
    | 3 -> Axis Bulgaria
    | 7 -> Allied France
    | 8 -> Axis German
    | 9 -> Allied Greece
    | 10 -> Allied UnitedStates
    | 11 -> Axis Hungary
    | 13 -> Axis Italy
    | 15 -> Allied Norway
    | 16 -> Allied Poland
    | 18 -> Axis Romania
    | 20 -> Allied SovietUnion
    | 23 -> Allied GreatBritian
    | 24 -> Allied Yougaslovia
    | _ -> Neutral


Moving on from nation, I went to Equipment. This is a bit more complex. There are different types of equipment: Movable equipment, Flyable Equipment, etc…. Instead of doing the typical OO “is-a” exercise, I started with the attributes for all equipment:


type BaseEquipment =  {
    Id: int; Nation: Nation;
    IconId: int
    Description: string; Cost: int;
    YearAvailable:int; MonthAvailable: int;
    YearRetired: int; MonthRetired: int;
    MaximumSpottingRange: int;
    GroundDefensePoints: int
    AirDefensePoints: int
    NavalDefensePoints: int
    }


Since all units in PG can be attacked, they all need defense points. Also notice that there is a Nation attribute on the equipment – once again F# prevents null refs by lazy programmers (which is me quite often) – you can’t have equipment without a nation.


Once the base equipment is set, I needed to assign attributes to different types of equipment. For example, tanks have motors so therefore have fuel capacity. It makes no sense to have a fuel attribute to a horse-drawn unit, for example. Therefore, I needed a movable and then motorized movable equipment types


type MoveableEquipment = {
    MaximumMovementPoints: int;
    }
    
type MotorizedEquipment = {
    MoveableEquipment: MoveableEquipment
    MaximumFuel: int}


Also, there are different types of motorized equipment for land (that might be tracked, wheeled, half-tracked) as well as sea and air equipment:


type FullTrackEquipment = | FullTrackEquipment of MotorizedEquipment
type HalfTrackEquipment = | HalfTrackEquipment of MotorizedEquipment
type WheeledEquipment = | WheeledEquipment of MotorizedEquipment

type TrackedEquipment =
FullTrack of FullTrackEquipment
HalfTrack of HalfTrackEquipment

type LandMotorizedEquipment =
Tracked of TrackedEquipment
Wheeled of WheeledEquipment

type SeaMoveableEquipment = {MotorizedEquipment: MotorizedEquipment}
type AirMoveableEquipment = {MoveableEquipment: MoveableEquipment}


With the movement out of the way, some equipment can engage in combat (like a tank) and others cannot (like a transport)


type LandTargetCombatEquipment = {
    CombatEquipment: CombatEquipment;
    HardAttackPoints: int;
    SoftAttackPoints: int;
    }

type AirTargetCombatEquipment = {
    CombatEquipment: CombatEquipment;
    AirAttackPoints: int;
    }

type NavalTargetCombatEquipment = {
    CombatEquipment: CombatEquipment;
    NavalAttackPoints: int
    }


With movement and combat accounted for, I could start building the types of equipment


type InfantryEquipment = {
    BaseEquipment: BaseEquipment
    EntrenchableEquipment: EntrenchableEquipment;
    MoveableEquipment: MoveableEquipment;
    LandTargetCombatEquipment: LandTargetCombatEquipment
    }


type TankEquipment = {
    BaseEquipment: BaseEquipment
    FullTrackedEquipment: FullTrackEquipment;
    LandTargetCombatEquipment: LandTargetCombatEquipment
    }


There are twenty two different equipment types – you can see them all in the github repsository here.


With the equipment out of the way, I was ready to start creating units – unit have a few stats like name and strength, as well as how much ammo and experience they have if they are a combat unit


type UnitStats = {
    Id: int
    Name: string
    Strength: int;
    }
    
type ReinforcementType =
Core
Auxiliary

type CombatStats = {
    Ammo: int;
    Experience:int;
    ReinforcementType:ReinforcementType    }

type MotorizedMovementStats = {
    Fuel: int;}


With these basic attributes accounted for, I could then make units of the different equipment types. For example:


type InfantryUnit = {UnitStats: UnitStats; CombatStats: CombatStats; Equipment: InfantryEquipment
    CanBridge: bool; CanParaDrop: bool}
type TankUnit = {UnitStats: UnitStats; CombatStats: CombatStats; MotorizedMovementStats:MotorizedMovementStats
    Equipment: TankEquipment}


PG also has different kinds of infantry units like this:

type Infantry =
Basic of InfantryUnit
HeavyWeapon of InfantryUnit
Engineer of InfantryUnit
Airborne of InfantryUnit
Ranger of InfantryUnit
Bridging of InfantryUnit


and then all of the land units can be defined as:


type LandCombat =
Infantry of Infantry
Tank of TankUnit
Recon of ReconUnit
TankDestroyer of TankDestroyerUnit
AntiAir of AntiAirUnit
Emplacement of Emplacement
AirDefense of AirDefense
AntiTank of AntiTank
Artillery of Artillery


There are a bunch more for sea and air, you can see on the github repository. Once they are all defined, they can be brought together like so:


type Transport =
Land of LandTransportUnit
Air of AirTransportUnit
Naval of NavalTransport

type Unit =
Combat of Combat
Transport of Transport


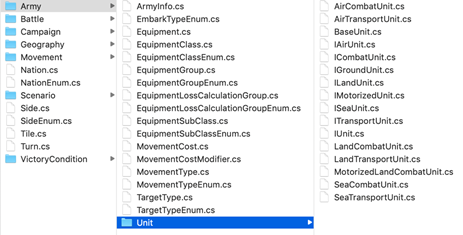
It is interesting to compare this domain model to the C# implementation I created six years ago. They key difference that stick out to me is to take properties of classes and turn them into types. So instead of a Fuel property of a unit that may or may not be null, there are MotorizedUnit types that require a fuel level. Instead of a bool field of like CanAttack or an interface like IAttackable, the behavor is baked into the type


Also, the number of files and code dropped significantly, which definitely improved the code base:


It is not all fun and games though, because I still need a mapping function to take the data files from the game and map them, to the types


as well as functions to pull actionable data out of the type like this:


let getMoveableEquipment unit =
    match unit with 
    | Unit.Combat c -> 
        match c with 
        | Combat.Air ac -> 
            match ac with
            | AirCombat.Fighter acf ->
                match  acf with
                | Fighter.Prop acfp -> Some acfp.Equipment.MotorizedEquipment.MoveableEquipment
                | Fighter.Jet acfj -> Some acfj.Equipment.MotorizedEquipment.MoveableEquipment
            | AirCombat.Bomber acb ->
                match acb with
                | Bomber.Tactical acbt -> Some acbt.Equipment.MotorizedEquipment.MoveableEquipment
                | Bomber.Strategic acbs -> Some acbs.Equipment.MotorizedEquipment.MoveableEquipment
        | Combat.Land lc ->
            match lc with 


So far, that trade-off seems worth it because I just have to write these supporting functions once and I get guaranteed correctness across the entire code base – without hopes, prayers, and unit tests….


Once I had the units set up, I followed a similar exercise for Terrain. The real fun for me came to the next module – the series of functions to calculate movement of a unit across terrain. Each tile has a movement cost that is calculated based on the kind of equipment and the condition of a tile (tanks move slower over muddy ground)


let getMovmentCost (movementTypeId:int) (tarrainConditionId:int)
    (terrainTypeId:int) (mcs: MovementCostContext.MovementCost array) =
    mcs |> Array.tryFind(fun mc -> mc.MovementTypeId = movementTypeId &&
                                    mc.TerrainConditionId = tarrainConditionId &&
                                    mc.TerrainTypeId = terrainTypeId)


I need the ability to calculate all possible moveable tiles for a given unit. There are some supporting functions that you can review in the repository and the final calculator I am very happy with


let getMovableTiles (board: Tile array) (landCondition: LandCondition) (tile:Tile) (unit:Unit)  =
    let baseTile = getBaseTile tile
    let maximumDistance = (getUnitMovementPoints unit) – 1
    let accumulator = Array.zeroCreate<Tile option0
    let adjacentTiles = getExtendedAdjacentTiles accumulator board tile 0 maximumDistance
    adjacentTiles
    |> Array.filter(fun t -> t.IsSome)
    |> Array.map(fun t -> t.Value)
    |> Array.map(fun t -> t, getBaseTile t)
    |> Array.filter(fun (t,bt) -> bt.EarthUnit.IsNone)
    |> Array.filter(fun (t,bt) -> canLandUnitsEnter(bt.Terrain))
    |> Array.map(fun (t,bt) -> t)


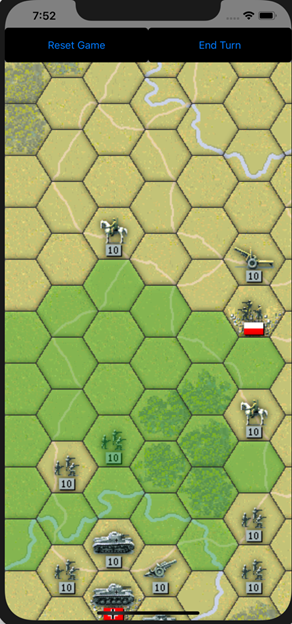
and the results show:


With the domain set up, I can then concentrate on the game play


Animations in Xamarin Forms (XF)

(Part 7 of the Panzer General Portable Project)

Granted, there are not a lot of animations in Panzer General – which is one of the reasons I thought it would be a good candidate for Fabulous and XF.  However, there is 1 place where there is a 6 frame animation – when there is a battle and a unit takes damage.  The images look like this:

explode

and animated like this

When I did Panzer General in Windows Phone 6/7 using WPF, it was very simple to use a a storyboard and an ObjectAnimation class like this

1 <Storyboard x:Name="ExplodeStoryboard"> 2 <ObjectAnimationUsingKeyFrames 3 Storyboard.TargetName="ExplodeTranslateTransform" 4 Storyboard.TargetProperty="X" Duration="0:0:1" Completed="ObjectAnimationUsingKeyFrames_Completed"> 5 <DiscreteObjectKeyFrame KeyTime="0:0:0" Value="0" /> 6 <DiscreteObjectKeyFrame KeyTime="0:0:.2" Value="-60" /> 7 <DiscreteObjectKeyFrame KeyTime="0:0:.4" Value="-120" /> 8 <DiscreteObjectKeyFrame KeyTime="0:0:.6" Value="-180" /> 9 <DiscreteObjectKeyFrame KeyTime="0:0:.8" Value="-240" /> 10 <DiscreteObjectKeyFrame KeyTime="0:0:1" Value="100" /> 11 </ObjectAnimationUsingKeyFrames> 12 </Storyboard>

In XF, it looks like there is only 1 timer available so I need to hook into it like this

1 module ChickenSoftware.PanzerGeneral.ExplodeDemo 2 3 open Xamarin.Forms 4 5 let addContent (layout:AbsoluteLayout) = 6 let image = new Image() 7 image.Source <- ImageSource.FromResource("explode0") 8 let x = 50.0 9 let y = 50.0 10 let height = 50.0 11 let width = 60.0 12 let rectangle = new Rectangle(x,y,width,height) 13 layout.Children.Add(image , rectangle) 14 15 let mutable index = 1 16 let callback = new System.Func<bool>(fun _ -> 17 match index with 18 | 1 -> image.Source <- ImageSource.FromResource("explode1"); index <- 2 19 | 2 -> image.Source <- ImageSource.FromResource("explode2"); index <- 3 20 | 3 -> image.Source <- ImageSource.FromResource("explode3"); index <- 4 21 | 4 -> image.Source <- ImageSource.FromResource("explode4"); index <- 5 22 | 5 -> image.Source <- ImageSource.FromResource("explode0"); index <- 99 23 | _ -> () 24 true) 25 Device.StartTimer(System.TimeSpan.FromSeconds(20.25),callback) 26 27 let populateImage = 28 let layout = new AbsoluteLayout() 29 layout.HeightRequest <- 5000.0 30 layout.WidthRequest <- 5000.0 31

The key lines is 16, where I create the callback function that gets called each time the timer triggers and then line 25 when the Device class has a method called “StartTimer”

This works

image

since there is no other animation in the game, I *think* this will work.  I guess I will see soon enough

Handling User Interaction Using Xamarin Forms (XF)

(Part 6 of the Panzer General Portable Project)

Now that I have a rudimentary board in place, I need to understand basic user interaction with the board. The most common gesture is the tap. When I creted the Windows Phone 6/7 version of this game using native WPF, it was very easy to work with these concepts. The Xamarin Forms (XF), not so much.

In XF, capturing a user’s tap on the screen is done via the TapGestureRecognizer class. For example, to see if a person taps on an given game hex you can write some code like this (lines 1 and 19 are the important ones below):

1 let tapRecognizer = new TapGestureRecognizer() 2 3 let getTerrainFrame (tile: Tile) (scale:float) = 4 let baseTile = getBaseTile tile 5 let baseTerrain = getBaseTerrainFromTerrain baseTile.Terrain 6 let tileId = baseTerrain.Id 7 let locatorPrefix = 8 match baseTerrain.Condition with 9 | LandCondition.Dry -> "tacmapdry" 10 | LandCondition.Frozen -> "tacmapfrozen" 11 | LandCondition.Muddy -> "tacmapmuddy" 12 let frame = new TileFrame(tile) 13 let terrainImageLocator = locatorPrefix + tileId.ToString() 14 let image = getImage terrainImageLocator 15 image.Scale <- (scale + 0.6) 16 frame.BackgroundColor <- Color.Transparent 17 frame.BorderColor <- Color.Transparent 18 frame.Content <- image 19 frame.GestureRecognizers.Add(tapRecognizer) 20 frame 21

The getTerrainFrame is called for each hex that is created for the game board

Since there can be multiple frames layered on top of the base terrain image (like units, nation flags, etc..) we need a way for those frames to not capture the tap event. Enter the InputTransparent property (line 8 below)

1 let getSingleUnitFrame (iconId:int) (scale:float) = 2 let frame = new Frame() 3 let path = "tacicons" + iconId.ToString() 4 let image = getImage path 5 image.Scale <- (scale + 0.6) 6 frame.BackgroundColor <- Color.Transparent 7 frame.BorderColor <- Color.Transparent 8 frame.InputTransparent <- true 9 frame.Content <- image 10 Some frame 11

With each hex’s base frame now wired up to this tap recognizer, I need a way to send data into the event and a way to get the data out of the event.

My first thought was to use the eventArgs – which is the way I have done it 100% of the time before this project. I was thinking code like this:

1 type TapEventArgs(tileId:int) = 2 inherit EventArgs() 3 member this.TileId = tileId 4

Where I have an custom event type that inherits from EventArgs and can can put whatever data I want into the additional properities – in this case the unique Id for the Hex/Tile

I could then create an event handler that handles the event and gets the needed data from the event args:

1 let handleTapEvent (sender:Object) (e:TapEventArgs) = 2 app.MainPage.DisplayAlert(e.TileId.ToString(), "OK") |> ignore 3 () 4

And then to wire things together, I would use an EventHandler class

1 let tapEventHandler = new EventHandler<TapEventArgs>(handleTapEvent) 2 tapRecognizer.Tapped.AddHandler(tapEventHandler :> EventHandler<EventArgs>) 3

Unfortunately, this does not work!  When doing a simple cast, I get

The type ‘EventArgs’ is not compatible with the type ‘TapEventArgs’

and if I try and force it into the event handler

1 let tapEventHandler = new EventHandler<TapEventArgs>(handleTapEvent)

I get this error

This expression was expected to have type ‘EventHandler’ but here has type ‘EventHandler<TapEventArgs>’

You can see my trail of tears on stack overflow here

So instead of spending my time fighting with the compiler, I decided to use the other event arg: object

1 let handleTapEvent (sender:Object) (e:EventArgs) = 2 let tileFrame = sender 😕> TileFrame 3 let tile = tileFrame.Tile 4 let baseTile = getBaseTile tile 5 let tileId = baseTile.Id.ToString() 6 app.MainPage.DisplayAlert("Tile Pressed", tileId, "OK") |> ignore 7 () 8

with the TileFrame inheriting from Frame like so

1 type TileFrame(tile:Tile) = 2 inherit Frame() 3 member this.Tile = tile 4

and I get what I need

image

Creating an Initial Game Board

(Part 5 of the Panzer General Portable Project)

The first game-like task I wanted to accomplish was to set up the base game board – like I did here seven years ago.  I fired up the F# Xamarin Forms (XF) project I was working on last post and open the app.fs file.  Following the “Full-On Monty” Elm pattern, I am not going to do any of this app in markup so there are no XAML files to deal with.

Inside the app.fs file, I first created a record type to keep track of the tiles and units for each hex (later in this series, I will create a proper domain model – for now this is a just a spike to see what it takes to render the game board – I named it ContentData).  Notice that ContentData always had a Tile, Row and Column, but it does not always have a unit on it – so I used an option type. for Unit.  I also needed a type for the Tile, the Unit, and the Equipment – starting with image then moving out to additional data to make the game work.  Enter type providers – all I needed to do was to point to the files that were already part of the solution to get the types

1 type TileContext = JsonProvider<"Data//Scenario_Tile.json"> 2 type UnitContext = JsonProvider<"Data//Scenario_Unit.json"> 3 type EquipmentContext = JsonProvider<"Data//Equipment.json"> 4 type ContentData = {TileId: int; ColumnNumber: int; RowNumber: int; UnitId: int option} 5

I then created three functions to get the data for each instance of those types

1 let getTiles (scenarioId:int) = 2 let assembly = IntrospectionExtensions.GetTypeInfo(typeof<App>).Assembly 3 let stream = assembly.GetManifestResourceStream("scenariotile"); 4 let reader = new StreamReader(stream) 5 let json = reader.ReadToEnd() 6 let scenarioTile = TileContext.Parse(json) 7 scenarioTile.Dataroot.ScenarioTile 8 |> Array.filter(fun st -> st.ScenarioId = scenarioId) 9 10 let getUnits (scenarioId: int) = 11 let assembly = IntrospectionExtensions.GetTypeInfo(typeof<App>).Assembly 12 let stream = assembly.GetManifestResourceStream("scenariounit"); 13 let reader = new StreamReader(stream) 14 let json = reader.ReadToEnd() 15 let unit = UnitContext.Parse(json) 16 unit.Dataroot.ScenarioUnit 17 |> Array.filter(fun su -> su.ScenarioId = scenarioId) 18 19 let getEquipments = 20 let assembly = IntrospectionExtensions.GetTypeInfo(typeof<App>).Assembly 21 let stream = assembly.GetManifestResourceStream("equipment"); 22 let reader = new StreamReader(stream) 23 let json = reader.ReadToEnd() 24 let equipment = EquipmentContext.Parse(json) 25 equipment.Dataroot.Equipment

You first thought is “this screams refactoring to a high order function” and I would agree.  I will do that in next iteration

In any event, I needed a way to create the actual image from the file path and then a way of hydrating the ContentData

1 let createImage path = 2 let image = new Image() 3 image.Source <- ImageSource.FromResource(path) 4 image 5 6 let createTileContentData (tile:TileContext.ScenarioTile) (units: UnitContext.ScenarioUnit seq) (equipments: EquipmentContext.Equipment seq) = 7 let scenarioUnit = 8 units 9 |> Seq.tryFind(fun u -> u.StartingScenarioTileId = tile.ScenarioTileId) 10 let unitId = 11 match scenarioUnit with 12 | Some u -> 13 let equipment = equipments |> Seq.find(fun e -> e.EquipmentId = u.EquipmentId) 14 Some equipment.Icon 15 | None -> None 16 17 {TileId = tile.TerrainId; 18 ColumnNumber = tile.ColumnNumber; 19 RowNumber = tile.RowNumber; 20 UnitId = unitId}

With this function ready to return the image, I needed a way to put it in the correct place on the board.  In XF, this is accomplished via the Rectangle type

1 let createRectangle columnIndex rowIndex scale = 2 let height = 50.0 * scale 3 let width = 60.0 * scale 4 let yOffsetPlug = 25.0 * scale 5 let xOffsetPlug = -15.0 * scale 6 let columnIndex' = float columnIndex 7 let rowIndex' = float rowIndex 8 let yOffset = 9 match columnIndex % 2 = 0 with 10 | true -> yOffsetPlug 11 | false -> yOffsetPlug + yOffsetPlug 12 let xOffset = (columnIndex' * xOffsetPlug) + xOffsetPlug 13 let x = xOffset + columnIndex' * width 14 let y = yOffset + rowIndex' * height 15 new Rectangle(x,y,width,height)

With the individual hex functions ready, I was ready to put them onto the screen.  In XF, there is a type called layout that seems what I need to position images in absolute positions

1 let createLayout numberOfTiles scale = 2 let width = 60.0 * scale 3 let height = 50.0 * scale 4 let layout = new AbsoluteLayout() 5 layout.WidthRequest <- 12.0 * width 6 let rows = numberOfTiles % 20 |> float 7 layout.HeightRequest <- rows * height 8 layout

With the layout ready, I could create a function that takes in the layout, an individual hex’s contentdata, find it in the image files, and put it on the board.  I used the Children property of the Layout type to push multiple images on the same hex – I am not sure about Z-ordering yet, so I put the unit image after the tile

1 let addTileContent (layout:AbsoluteLayout) (contentData: ContentData) (scale: float) = 2 let rectangle = createRectangle contentData.ColumnNumber contentData.RowNumber scale 3 let terrainImageLocator = "tacmapdry" + contentData.TileId.ToString() 4 layout.Children.Add(createImage terrainImageLocator, rectangle) 5 match contentData.UnitId with 6 |Some i -> 7 let unitImageLocator = "tacicons" + i.ToString() 8 layout.Children.Add(createImage unitImageLocator, rectangle) 9 |None -> ()

With the individual hex functions ready, I could iterate through the first scenario and populate its initial board.  Notice that I put the Content control inside a ScrollView type that then put into a ContentPage that is then put into the Page.  I think the common convention is right – UX is very much OO in nature

1 let populateBoard = 2 let tiles = getTiles 0 3 let units = getUnits 0 4 let equipments = getEquipments 5 let numberOfTiles = tiles |> Seq.length 6 let scale = 1.0 7 let layout = createLayout numberOfTiles scale 8 tiles 9 |> Array.map(fun t -> createTileContentData t units equipments) 10 |> Array.iter(fun cd -> addTileContent layout cd scale) 11 let scrollView = new ScrollView() 12 scrollView.Orientation <- ScrollOrientation.Both 13 scrollView.Content <- layout 14 base.MainPage <- ContentPage(Content = scrollView) 15 16 do 17 populateBoard

So when I fired up the emulator, I got some pretty good first results

Screen Shot 2018-11-08 at 8.22.57 PM

Out of the box with Win Phone, I could pinch and spread a location and the screen images would automatically adjust and get bigger/smaller.  No such luck with XF – so I need to see how to do that.  In any event, zooming into the bottom left corner, all Panzer General fans will immediate recognize this layout. 

image

And it looks pretty good compared to the winphone

image

and the original game

image

Lots to do, but I am happy with the progress

Gist is here

Creating File Reference For An XF Shared .FSProj File

(Part 4 of the Panzer General Portable Project)

As I talked about in the last post, I have about 700 images to be referenced from the Panzer General Portable game.  When dealing with images in Xamarin Forms (XF), there are two choices:  make the image an embedded resource in the shared project or create a stub in the shared project and have the image in both the iOS and Android project.  Following Occam’s Razor, I opted for one file in the shared project.

Going back to the project, I opened the shared project and added the folder that contained all of the images.  A demo project looks like this:

Screen Shot 2018-11-08 at 6.15.01 PM

So far so good. 

I then high-lighted all of the images (that took a bit) and right clicked –> Build Action –> EmbeddedResource

Screen Shot 2018-11-08 at 6.16.20 PM

Visual Studio then tagged each of the files with a ResourceId of the file name:

Screen Shot 2018-11-08 at 6.15.29 PM

So far, so bad.  When I tried to reference these files in my code, the app could not find the images

So it turns out that when you are doing cross-platform development, Xamarin tries to reconcile any problems to the lowest level.  In this case, Android has some very specific opinions about naming and the file names that I used did not match.  iOS does not seem to have such limitations.   The frustrating thing for me is that Visual Studio for Mac let me assign illegal values and did not issue any warnings so it took way too long of trial and error to figure this out.  In my case, I used an underscore “_", which is an illegal character.

When I renamed a test image and followed the same steps, I got it working

Screen Shot 2018-11-08 at 6.15.48 PM

So I then went back and changed the naming of the photo parsing script.  But then I realized that highlighting all of the files in the solution explorer is a drag, so I wrote a new script that gave the correct file name and ResourceId for the fsproj file:

1 let createBlock (resource:string) (logicalName:string)= 2 ""\"><LogicalName>" + logicalName + "</LogicalName></EmbeddedResource>"

I then looped though all of the images files and created a text file

1 let getOutput path = 2 let resources = getResources path 3 let logicalNames = getLogicalNames path 4 resources 5 |> Array.zip logicalNames 6 |> Array.map(fun (r,ln) -> createBlock ln r) 7 |> Array.map(fun s -> " " + s)

the getLogicalNames function makes the ResourceId (Logical name in the .fsproj) acceptable to Android

1 let getLogicalNames path = 2 subDirectoryInfos path 3 |> Array.collect(fun sdi -> sdi.GetFiles()) 4 |> Array.map(fun f -> f.Name) 5 |> Array.map(fun n -> n.ToLowerInvariant()) 6 |> Array.map(fun n -> n.Replace(".jpeg",String.Empty)) 7 |> Array.map(fun n -> n.Replace("_",String.Empty))

I took the contents of that file, open the Panzer General project .fsproj file, pasted it in, and I got my images working

Gist is here

Parsing Photos

(Part 3 of the Panzer General Portable Project)

When I created Panzer General Portable (PGP) for the windows phone, I had to deal with creating a game board based on a a single image file that looks like this:

image

There are 12 rows and 20 columns of images – each image is 60 pixels wide and 50 pixels wide.  Each image represents a hex on the game board.  When I did the Windows Phone app, I loaded this image each time in needed a hex – not the most efficient use of resources to be sure.  In addition to these game board images, there are similar composite images of units, country flags, etc..  The game board is a series of overlaid images for a given hex. The application keeps track of the correct image to be used via the x/y coordinates of the hex.  For example, the top left fix has a x/y of 0,0.

image


In other parts of the app, an index is used so the 0,0 hex is also index 0 with the 1,19 hex having an index value of 20.

image


You will also note that each image is a rectangle, and the area outside of the hex is a pink color.  Apparently, back in the old days, that color meant “transparent” to windows.  However, it does not to the iOS and Android, so that color needs to be converted into transparent

I fired up a new FSharp project in Visual Studio for Mac and created a F# script

I created a function that takes in the path to this composite image on my file system, a target directory where I want the small image to be written to, the name of that file, and the x y coordinates to locate the smaller image in the composite image:

1 let createHexImage sourcePath targetDirectory (fileName:string) x y = 2 let width = 60 3 let height = 50 4 let index = x + (y * 20) 5 use sourceImage = Image.FromFile(sourcePath) 6 use bitmap = new Bitmap(width,height) 7 use graphics = Graphics.FromImage(bitmap) 8 let targetRectangle = new Rectangle(0,0,width,height) 9 let sourceRectangle = new Rectangle(width*x,height*y,width,height) 10 graphics.DrawImage(sourceImage,targetRectangle,sourceRectangle,GraphicsUnit.Pixel) 11 graphics.Flush() 12 let transparentBitmap = createTransparentBitmap bitmap 13 let fileName = fileName.Replace("_",String.Empty) 14 let fileName' = targetDirectory + "//" + fileName + index.ToString() + ".jpeg" 15 transparentBitmap.Save(fileName') 16

The code is pretty straight forward File I/O and image creation.  Notice on line 12 a function called “createTransparentBitmap” is called to turn the pink into transparent.  That function is actually step 0 of a function chain like this (BTW: read from the bottom up in F# world):

1 let updateColor (color:Color) = 2 match color.R, color.G, color.B with 3 | 255uy,225uy,225uy -> Color.FromArgb(0x00FFFFFF) 4 | _,_,_ -> color 5 6 let getCoordinates index (bitmap:Bitmap) = 7 let y = index / bitmap.Width 8 let x = index % bitmap.Width 9 x,y 10 11 let adjustColor index (bitmap:Bitmap) = 12 let coordinates = getCoordinates index bitmap 13 let x = fst coordinates 14 let y = snd coordinates 15 let color = bitmap.GetPixel(x,y) 16 let updatedColor = updateColor color 17 bitmap.SetPixel(x,y,updatedColor) 18 19 let createTransparentBitmap (bitmap:Bitmap) = 20 let totalPixels = bitmap.Height * bitmap.Width 21 [0 .. totalPixels - 1] 22 |> Seq.iter(fun i -> adjustColor i bitmap) 23 bitmap

  • updateColor looks at a given pixel and if it is “pink”, it returns a new pixel of transparent, else it returns the pixel that came in (note that System drawing uses Pixel and Color interchangeably, which can be confusing)
  • getCordinates gets the pixel from the x,y coordinate of the bitmap
  • adjustColor takes in a bitmap and an index – it uses the index to locate the targeted pixel, updates the color if needed, and then sets a new pixel into the bitmap with the updated pixel.
  • createTransparentBitmap takes in the bitmap, calculates the total pixels, creates an array of integers, and then calls the adjustColor function

So after running this script, you can see my file system has a list of all of the images that the game needs:

image

The gist is here


g

Setting Up The Environment For Mobile Development

(Part 2 of the Panzer General Portable Project)

I tried, I really did, to use my ultra-hyped personal computer running Win10 and Visual Studio 2017 to create a Xamarin phone app.  Things were actually OK until I tried to launch the emulator for iOS and Android.  The machine just fell on its face and after waiting several minutes for the simulator to launch… and then crash, I gave up.

Also, since you need a Mac to publish to the Apple store, it made sense to go out and get a MacBook.  I know that you can “rent a Mac” for Apple store deployment using services like Azure Dev Ops, but:

  • I would have to develop on a PC (see the paragraph above)
  • I couldn’t debug on a real device
  • Everyone, I mean everyone, I talked to about writing a phone app said to get a Mac to reduce friction
  • I could finally look like a hipster hacker at the local Starbucks

Getting started with a MacBook wasn’t particular hard – though I had to retrain some muscle memory for the keyboard shortcuts.  Visual Studio for Mac certainly has some quirks that are worth mentioning (some of which I documented here):

1) VS sits on top of XCode.  If XCode has an update, VS may not recognize it, so it will break.  A rule of thumb is to manually update XCode whenever there is a VS update, and manually update VS whenever there is an XCode Update

2) Managing files in the .fsproj file is not seamless.  F# requires the files to be in a certain order for dependency management which allows the awesomeness of inferred typing when compiling.  In Visual Studio for the PC, you can hold down the shift key and move your files up and down.  There is no such feature in VS for Mac so you need to open the .fsproj file and manually move things as demonstrated here

3) Some some random reason, my solution would stop building and I would get the following errors.

Screen Shot 2018-11-07 at 3.22.01 PM

I put it into User Voice here – until then, I just recreate a new project.  Obviously once I start coding for real, this is not a good solution,

Panzer General Portable: Redux

(Part 1 of the Panzer General Portable Project)

I recently had the need to come up to speed on build a phone app targeting both iOS and Android.  Since I have limited experience with Cordova and I much prefer writing F# over javascript, it made sense to take a look at what Xamarin has to offer.  Coincidently, I went to a meet up where Don Syme and Jim Bennett were presenting a new F# framework based on Elm called fabulous.  So what the heck – what not take Xamarin and fabulous out for a spin?  I decided to revisit the game I wrote for Windows Phone 7 called Panzer General Portable.  I was especially curious how the code would compare from the original C# + XML to F# + Xamarin Forms + fabulous.

Over the coming weeks, I plan to post my journey into this endeavor.  Hopefully, I can learn some things, contribute to the F#/fabulous community, and have some fun.

Replacing Entity Framework Classes With Record Types

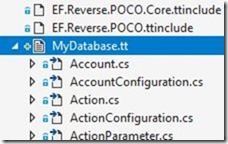
I recently have been working on a mixed-language project (C# and F#) where the original implementation used the Entity Framework reverse POCO generator found here.  If you are not familiar, this Visual Studio add-in uses a T4 template to inspect a database and generate Entity Framework classes based on the tables that are located in the database.  The generator created two files for a given table: the entity and a class for configuration.

Capture

At the time, it probably was the best way to generate the hundreds of classes that were needed for the C# project.  However, now that we are introducing F# to the code base, it made sense to use the right tool for the job.

AFAIK, there are two ways you can use F# to do ORM.  Way #1 is to use type providers and way #2 is to have record types and hand-roll the connectivity.  I would have preferred to use a type provider to expose the database types in two lines of code, but since these types are being used by other C# and VB.NET projects, this was not possible.

Option 2 was to create record types.  Instead of hand writing the types, I decided to create a quick script that turns C# classes into F# types.  Since the each individual C# class was in its own file, the script traverses a directory and pull all of the C# files:

1 open System 2 open System.IO 3 open System.Collections.Generic 4 5 let path = @"C:\Git\..." 6 let folderInfo = System.IO.DirectoryInfo(path) 7 let files = folderInfo.GetFiles("*.cs")

Within each file, I needed to get both the type name and then the properties.  Getting the name was a text search for “public class” and the attributes was “get;set”

1 let parseClass (values: IEnumerable<string>) = 2 let className = 3 values 4 |> Seq.filter(fun l -> l.Contains("public class")) 5 let typeName = 6 match className |> Seq.length with 7 | 0 -> None 8 | _ -> Some (className |> Seq.head) 9 let propNames = 10 values 11 |> Seq.filter(fun l -> l.Contains("{ get; set; }")) 12 typeName, propNames

With the parsed values (1 class name and an array of attributes), I could then create the type name and the type attributes:

1 let createTypeName (className:string option) = 2 match className with 3 | Some cn -> 4 let typeName = cn.Replace(" public class"," ").Trim() 5 match(typeName.Contains("Configuration")) with 6 | true -> None 7 | false -> Some typeName 8 | None -> None 9 10 let reverseValues (typeAttribute:string) = 11 let tokens = typeAttribute.Split(' ') 12 match tokens.Length with 13 | 0 | 1 -> "" 14 | _ -> tokens.[1] + ":" + tokens.[0] 15 16 let createTypeAttributes (items: IEnumerable<string>) = 17 let temp = 18 items 19 |> Seq.map(fun i -> i.Replace("public","")) 20 |> Seq.map(fun i -> i.Replace("{ get; set; }","")) 21 |> Seq.map(fun i -> i, i.IndexOf("//")) 22 |> Seq.filter(fun (i,t) -> t > 0) 23 |> Seq.map(fun (i,t) -> i.Substring(0,t)) 24 |> Seq.map(fun i -> i.Trim()) 25 |> Seq.map(fun i -> reverseValues i) 26 match Seq.length temp with 27 | 0 -> "" 28 | _ -> Seq.reduce(fun acc elem -> acc + ";" + elem) temp

With those values, set, I could then create the types:

1 let createType (values:string option * IEnumerable<string>) = 2 createTypeName(fst values), 3 createTypeAttributes (snd values)

and then it was just a matter of putting it all together:

1 let printType (typeName:string) (typeAttributes: string) = 2 printfn "type %s {%s}" typeName typeAttributes 3 4 files 5 |> Array.map(fun f -> f.FullName) 6 |> Array.map(fun fn -> fn, File.ReadLines(fn)) 7 |> Array.map(fun (fn,c) -> parseClass c) 8 |> Array.map(fun x -> createType x) 9 |> Array.filter(fun (x,y) -> x.IsSome) 10 |> Array.map(fun (x,y) -> x.Value, y) 11 |> Array.iter(fun (x,y) -> printType x y)

With these values, I could create a single file and have all of my domain objects in 1 place – with about 95% less noise code.

Git is here

Creating Mobile Apps With Xamarin.Forms and Visual Studio For Mac Using F#

I have worked through chapters one to nine in Petzold’s Creating Mobile Apps with Xamarin.Forms using Visual Studio For the Mac and F#.  I found a couple of gotchas that might trip up someone doing the same that I thought I could document here.  I am using a Mac Book Pro and Visual Studio Enterprise For Mac 2017.

1) The code samples found on GitHub are in C# with a folder for the F# port – well until chapter nine when he stopped with port.  Since we are in a “Pull Request or STFU” world, I will be adding my samples for chapter 9 and beyond.

Issue #1

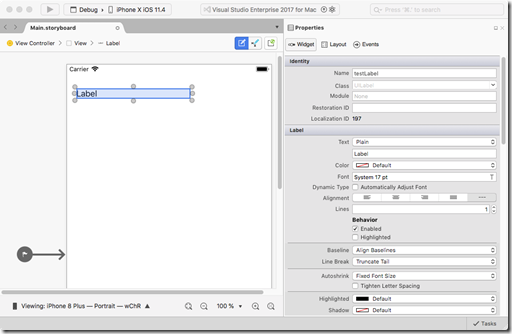
When you fire up Visual Studio for Mac and Select File –> New Solution –> Single View App (iOS –> app) and follow the default prompts, you will get a skeleton of a project.  Selecting Main.storyboard bring you to a designer that you can drag and drop controls onto an iPhone application, like a Label.  A problem arises when you try and given the Label a name like “testLabel”

Blog0

Just by setting the name, when you try and run your app, you get this error:

Objective-C exception thrown.  Name: NSUnknownKeyException Reason: [<ViewController 0x7f90f7a11310> setValue:forUndefinedKey:]: this class is not key value coding-compliant for the key testLabel.

The problem is that the IDE does not update the code-behind of the Main.Storyboard to reflect the new name.  If you open that file using “Source Code Editor”, you can then rename the id to “testLabel” from “name-outlet-197” and delete the destination attribute. 

Blog01

The project then runs

Issue #2

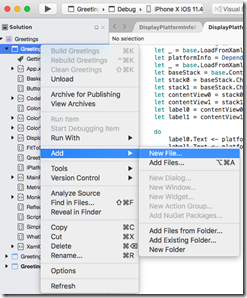
When you add a new File to an existing solution, in this case “MyPage”,

Screen Shot 2018-06-20 at 6.35.11 AM


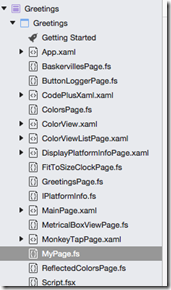
it shows up alphabetically in the solution explorer

Blog04

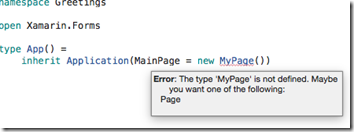
If you try and reference that new file in the App.xaml to display it on startup, you get the following error:

Screen Shot 2018-06-20 at 6.37.17 AM

This is because in F#, the ordering of files is important.  MyPage has to be visible to the compiler before App.xaml.  The way to fix this is to open the project items file, in this case Greetings.projitems:

Blog05

Screen Shot 2018-06-20 at 6.39.08 AM

and change the new file (MyPage.fs) location from the default location (the end)

Screen Shot 2018-06-20 at 6.39.34 AM

to above the app.xaml fie

Screen Shot 2018-06-20 at 6.39.58 AM


Issue #3

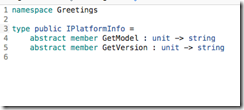
Chapter 9 talks about calling native code on each device and referring to those calls from the forms project.  To achieve this, you need to add an interface to the common project

Blog09

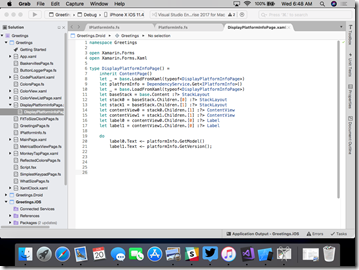
and then refer to it in the common project page

Blog08

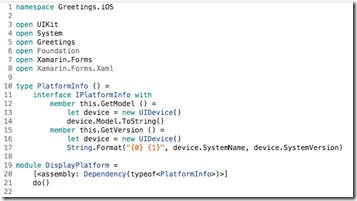
and to implement this in the iOS project

Blog07

I had to ask for help on Stack Overflow here.  Note that the “Dependency” attribute is in a module at the end, above the do() function.  I’ll be adding this code to the book’s repository in a bit, but at least this post will help others along.